
I have been embroidering for about two years and am mostly self taught. It is a great and relaxing hobby with low costs and great reward. I have embroidered items for our use and to give as presents.
I wanted to share some basic information if anyone is interested in doing their own embroidery. Today I am sharing what you need and next week what to do.
What you need:
Embroidery Hoop – You will want to start with two medium sizes, as you progress you will find what your preference is but for me a large hoop is too big for my hands and I very rarely need a small or mini one. Two medium gives me one to use actively in projects and one to display items
Needles – It is always good to have a few in case they go missing, they sell packs that have a few sizes which I suggest so you can once again find the size that works for you
Needle Threader – The one I prefer is pictured below, now I have four as one of these going missing will halt your whole embroidery project
 Fabric – To start I suggest a tight woven white fabric, it does not need to be 100% cotton but if it is you should wash it in hot water and dry it first. I bought a few meters from a local fabric store cheaply and have been cutting it for my monthly project, an alphabet project, and some nature ones for my dad. You can also try a plain cotton/canvas bag or find some pre-printed pieces from craft stores. The pre-printed pieces can be a great way to start and feel comfortable.
Patterns – If you are not going to use a pre-printed piece you can find a wide variety of patterns for cheap. I really like the Aunt Marthas selection of patterns by Colonial Patterns, this is the month one I have been working on. As the months have gone on I have been able to see my skills improve and they make a fun decoration for us.
Iron & Ironing Board – You will need to iron the fabric and also the patterns are iron on, I have a table top ironing board from IKEA and the iron Mr. H had before we met.
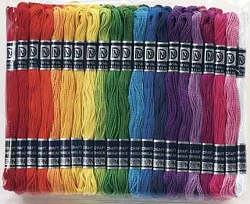
Thread – For starting out buy a pack of thread like the one pictured below. While you are getting use to everything there is really no need to be using really fancy thread. I am still using thread like this and love it, the only addition I have made is buying some grey for special purposes like Santas beard.
Scissors – I do not have special ones, I would like to get some soon but for starting out scissors that cut clean work great.
Pin cushion – I have two, one of the traditional tomato looking ones and then one my grandma bought me in Chinatown in San Francisco. The key is to have one that is a bit heavy for me as my smaller tomato one tended to roll away from me.
That is all the basic items you need to get started, other items like a way to organize your thread or place to store your other supplies just comes with time and seeing more of what your needs and space will allow. For now I keep my supplies in a bag Mr. H got as part of a nursing union thing, not perfect but it works!


